We will use the same simple test scenario as in this NetBeans & Selenium & Firefox & Java post.
1.Install the current version of Node.js
2. Download Gecko driver from: https://github.com/mozilla/geckodriver/releases and store it in some folder, for example: C:\tools\web-drivers\ .
3. Add the driver location to the PATH:

4. Run NetBeans IDE
5. File > New Project

6. Select Node.js Application > Next and then enter the project name and location:

7. Click Next and select Create package.json:

8. Open package.json and add dev dependency to use selenium-webdriver:
    "devDependencies": {
        "selenium-webdriver": "^3.0.1"    }

9. Install the package:

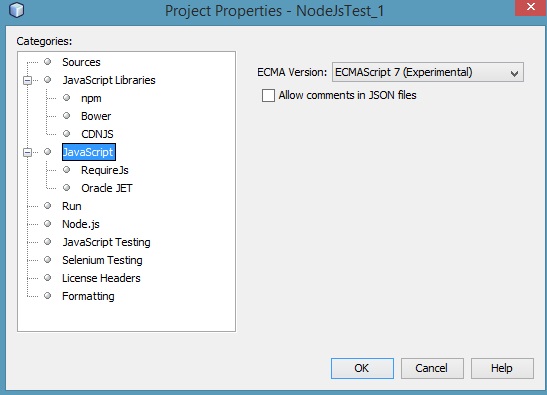
10. Set ES7 for the project in Settings:
11. Create new js file or use existing main.js and copy/paste the following code.
We use a very simple example, without any test framework (i.e. Mocha.js) and without any assertion library (Chai.js):
const webdriver = require('selenium-webdriver');
const Capabilities = require('selenium-webdriver/lib/capabilities')
        .Capabilities;

const capabilities = Capabilities.firefox();

capabilities.set('marionette', true);

const driver = new webdriver.Builder().withCapabilities(capabilities).build();

driver.get("https://automation-playground.blogspot.com");

const verifyTitle = async () => {
    const title = await driver.getTitle();
    return title === 'Automation Playground';
};

const printTestResult = async () => {
    const result = await verifyTitle();
    console.log("Test " + (result ? "passed." : "failed."));
};

printTestResult();

driver.close();
12. Click Run Project button (or F6) to execute the following test scenario:
- run Firefox browser
- go to https://automation-playground.blogspot.com
- verify the blog's title

Test passed!


